Add User
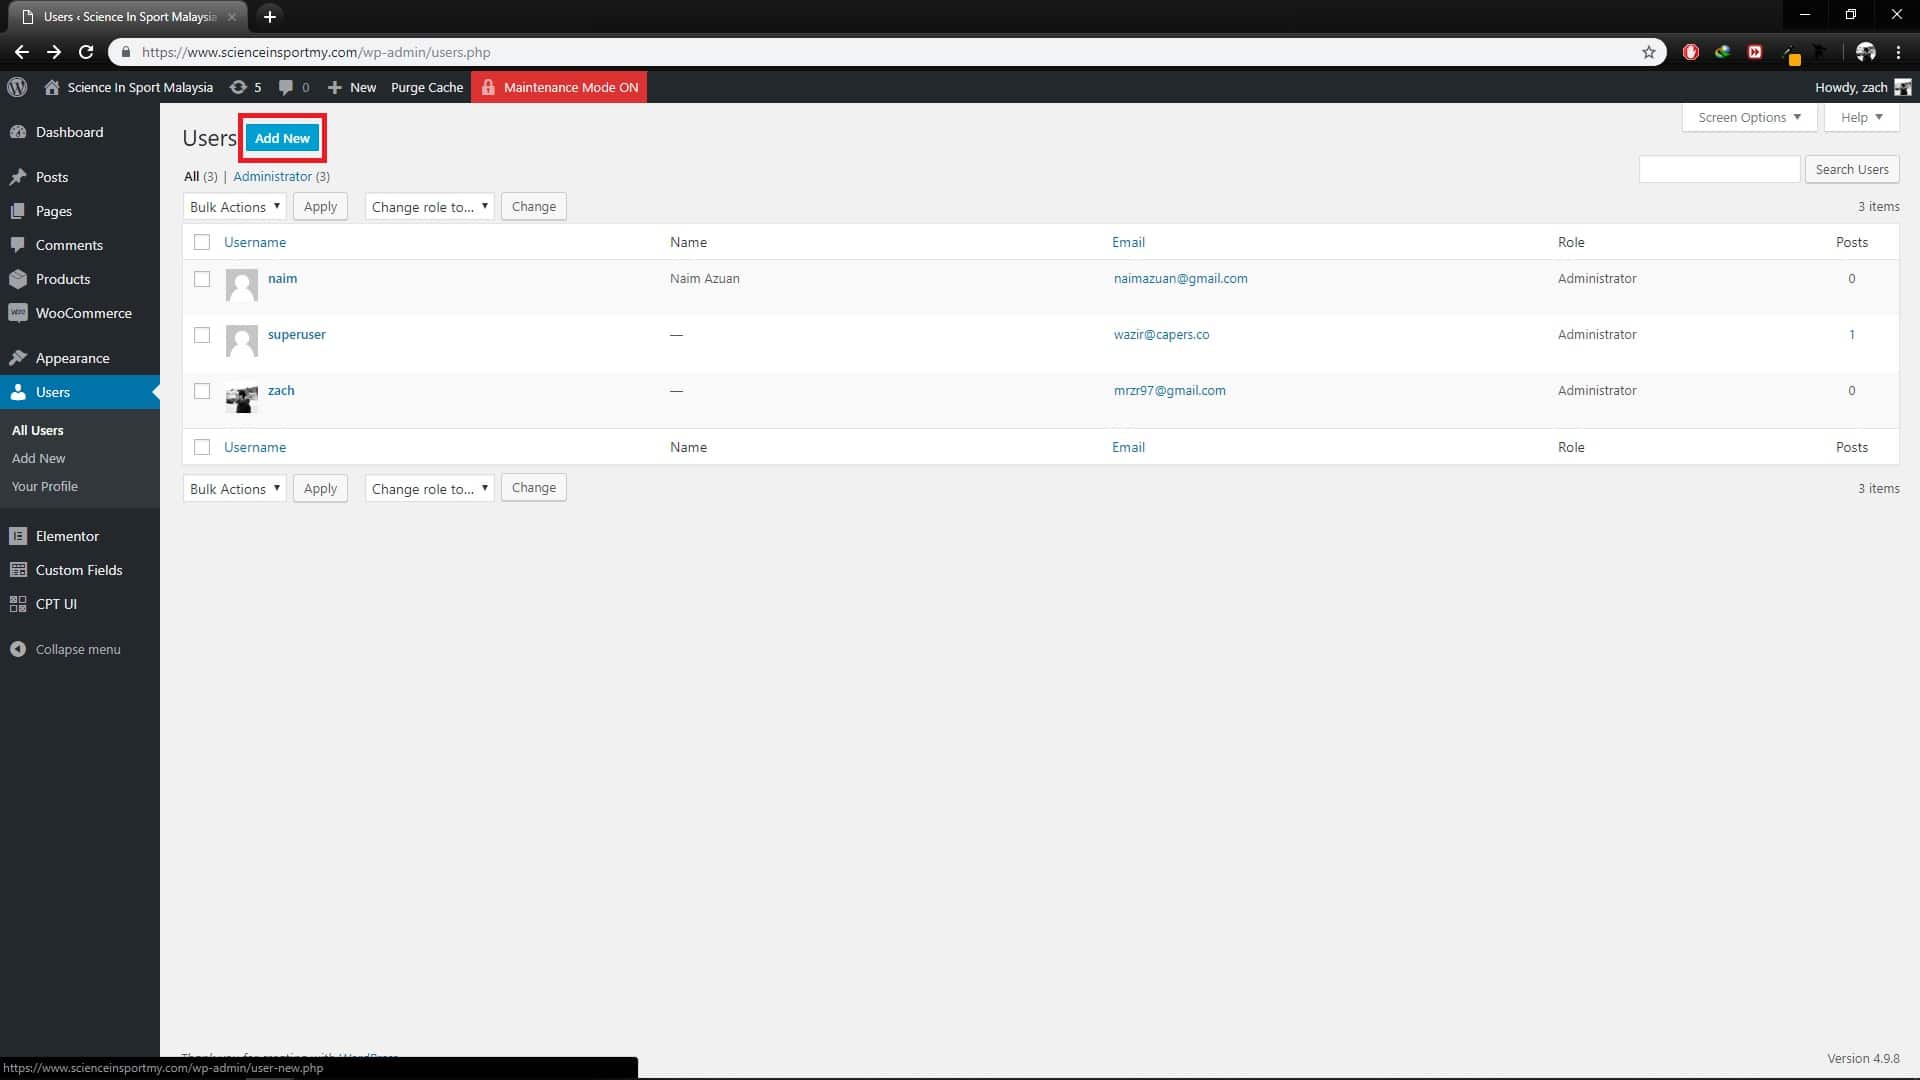
Step 1 : From dashboard, on the left menu, go to: Users > All Users
Step 2 : On the left top, click Add New.

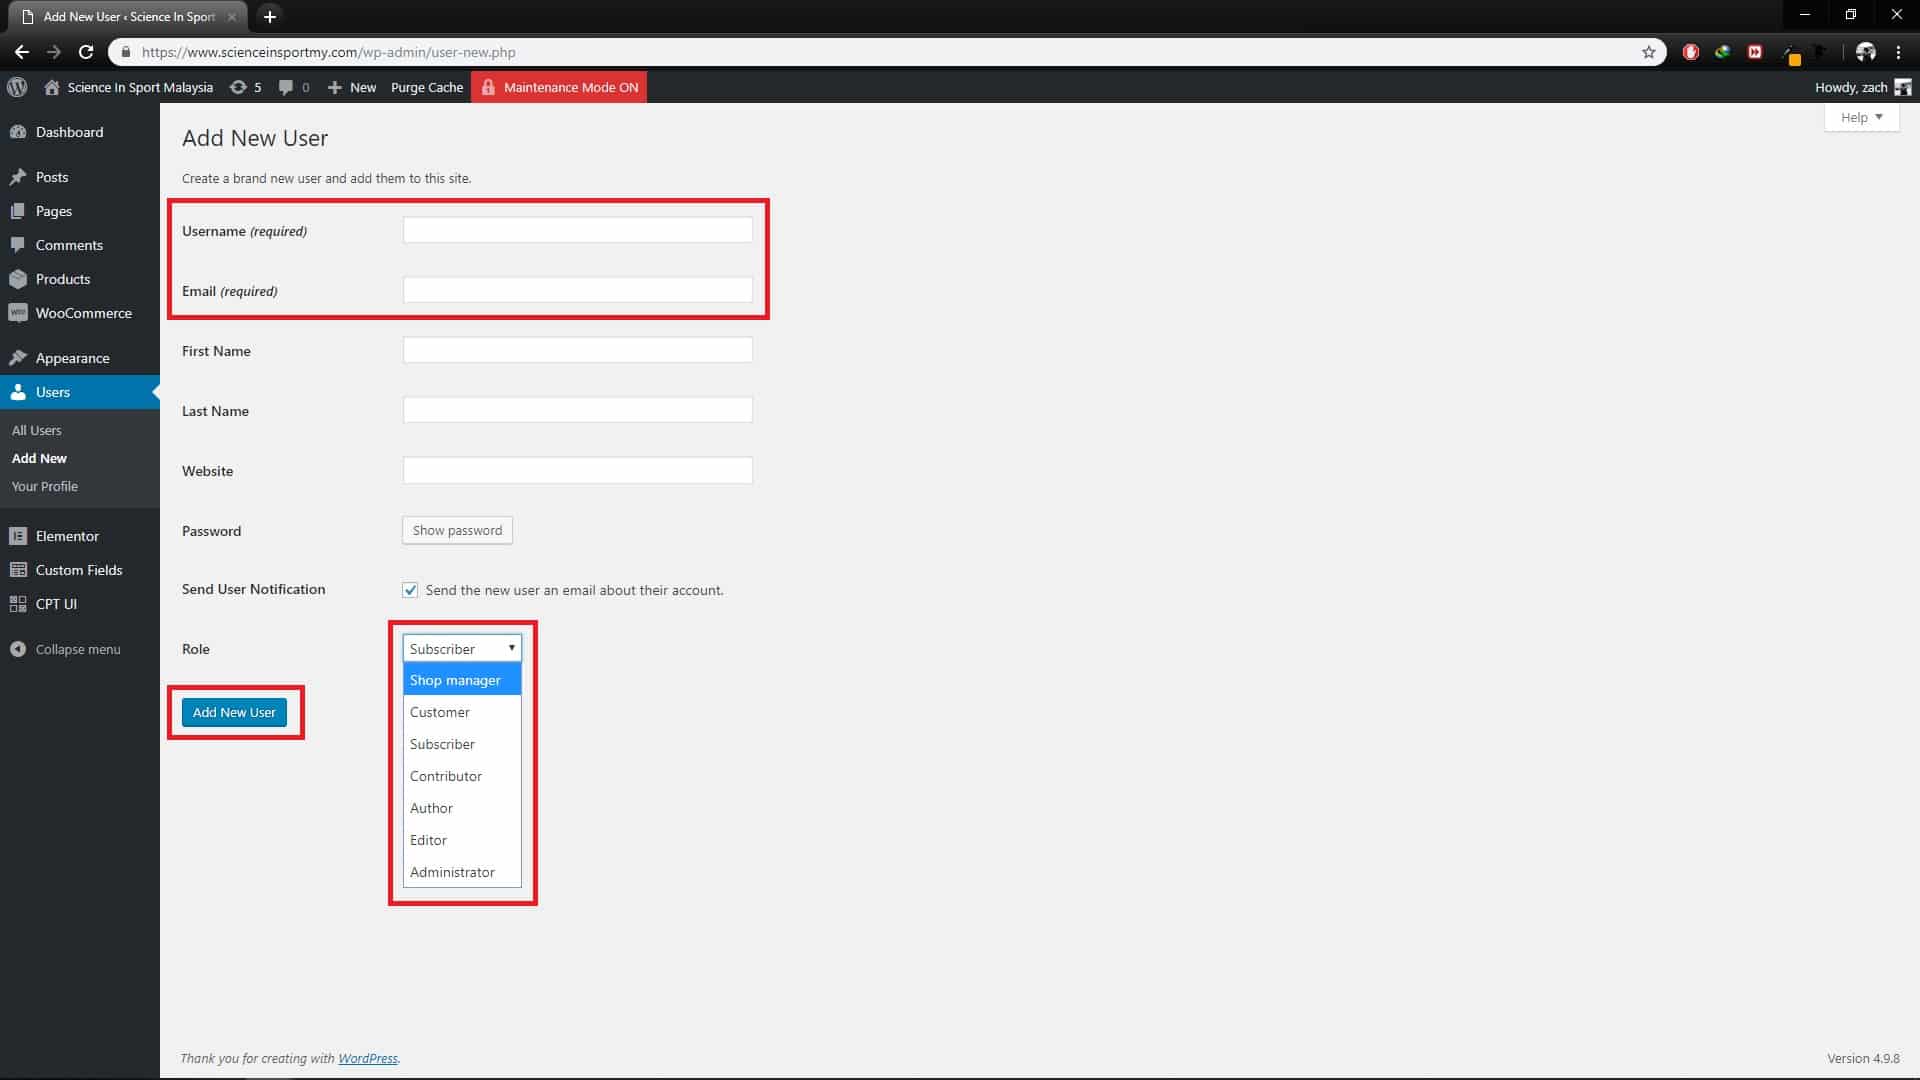
Step 3 : On the top two textbox, enter the required details.
Step 4 : To set the roles for user, select the Roles.
Step 5 : Lastly, click Add New User.

Add Roles
Notes: Roles Description
1. Super Admin
– access to the entire network if it exists.
2. Administrator
– has access to all administration features within a single site.
3. Editors
– can edit their own posts as well as others.
4. Author
– can write and publish their own posts.
5. Contributor
– can write posts but not publish them.
6. Subscriber
– only allows the user to read posts but not write anything.
7. Shop manager
– manage the shop without making them an admin.
– have all the rights a customer has.
– create/edit products and manage all settings within WooCommerce: Orders, Coupons and Settings.
– access to all WooCommerce reports.
– can edit their own posts as well as others.
8. Customer
– can read post.
– can edit their own account information.
– view past/present orders
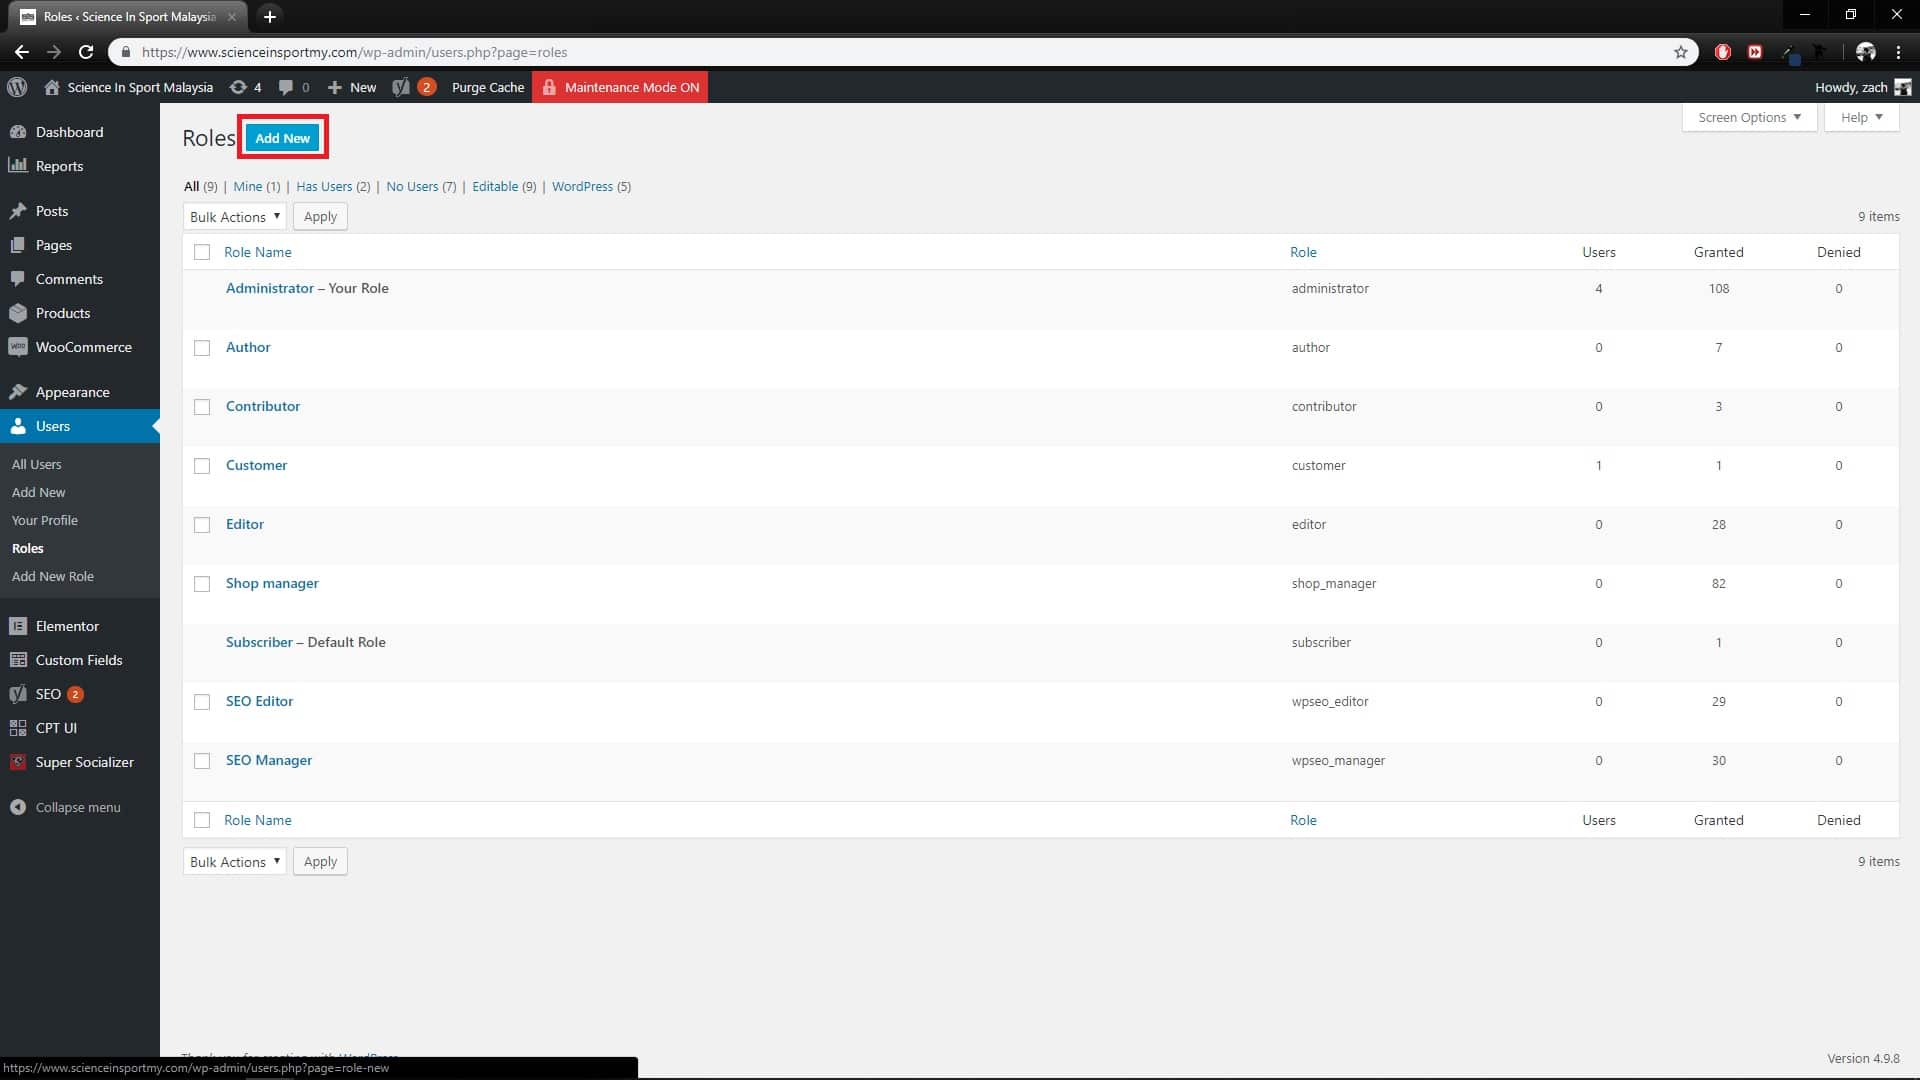
Step 1 : From dashboard, on the left menu, go to: Users > Roles
Step 2 : On the left top, click Add New.

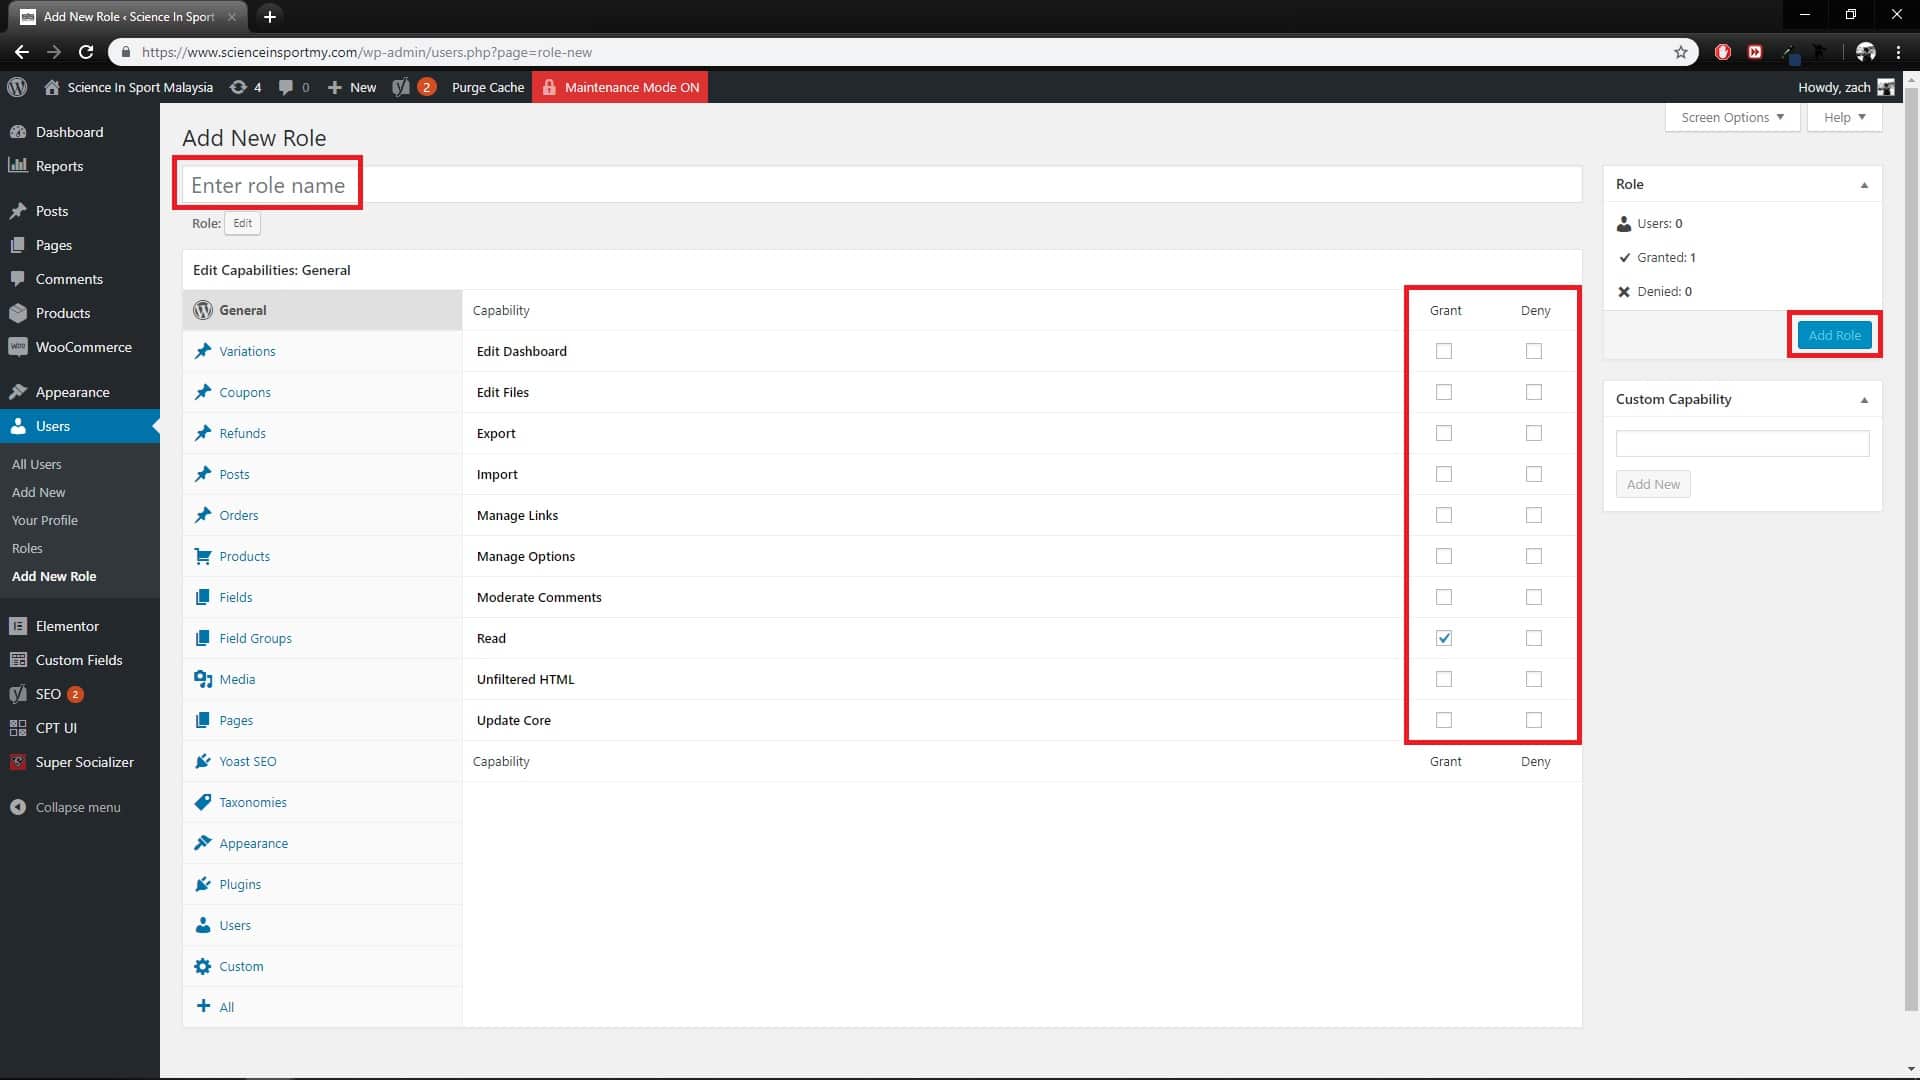
Step 3 : On the top textbox, enter the Role Name.
Step 4 : Next, click the Capability checkbox to be Grant or Deny for the roles..
Step 5 : Lastly, click Add Role.
